| ||
| ||
| ||
| ||
| ||
| ||
| ||
| ||
| ||
| ||
| ||
| ||
|
Support  E-mail
© Copyright 2014 website2Go.com All Rights Reserved |
| Site Members |
You are here: Help Topics > Site Members
Site Members
Build password-protected areas and control access to them
You may wish to restrict access to part of your website, allowing entry only to members of your organization, or in return for personal information provided by a visitor. The Site Members function can accommodate both types of restriction:
- A Private area is restricted to users on a list you create. You will communicate usernames and passwords to members after you add them to the list. The Site Manager username and password are automatically included in this list.
- A Semi-Private area permits members of a predefined group to register, but only if they can provide identification information to prove who they are. For example, you upload a list of employee last names and employee ID numbers. Then employees can join the group, but only after supplying a valid last name/ID combination. Members supply their own usernames and passwords.
- A Public area will allow any site visitor to register for access after providing certain information. You determine what information must be furnished.
- A website may have multiple protected areas, and multiple groups of authorized users.
How to use Site Members
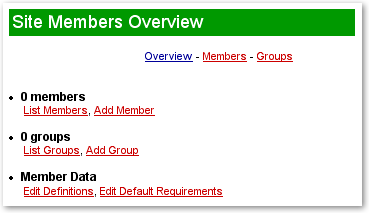
When you click the Site Members link in the Site Manager menu, you will see the Overview screen:
Members
You may add members to both private and public groups, and review the data provided by public members who registered themselves.
Groups
You may add new groups, or list and edit the characteristics of existing groups.
Member Data
Decide what information to collect on each member, and which fields must be completed to receive a password.
We suggest the following sequence:
- Set up the Member Data definitions and requirements.
- Create and configure the group(s) you'll need.
- Add members, if they won't be registering themselves.
- Build the Members Only area and assign one or more groups to it.
Member Data
Click Edit Definitions to set up fields to collect member data, each group may use some or all of these fields, but this is where the master set of fields is defined:
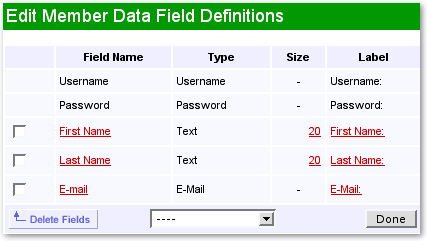
Click on an underlined item to access its edit dialog. Use the pop-up menu to add new text or email fields (an email field will be checked for appropriate user entry). Click Done when finished.
Click Edit Default Requirements to configure the default set of fields that appear in all groups, including new ones as they're created:
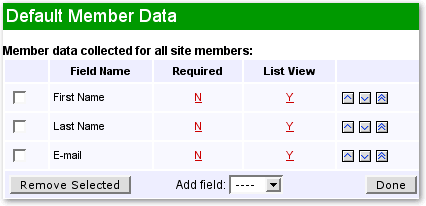
Use the Add Field pop-up menu to select additional fields from the master set defined in the previous step.
Groups
To add a new group, click on Add Group. A small window will open; type a name for the group and click OK. To edit existing groups, click List Groups:
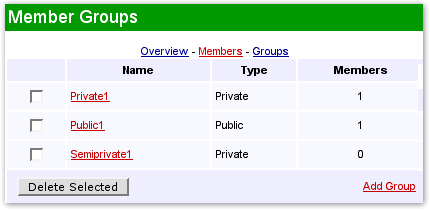
Remove one or more groups by checking their names and clicking the Delete Selected button.
Click on a group's name to declare it Private, Public, or Semi-Private:
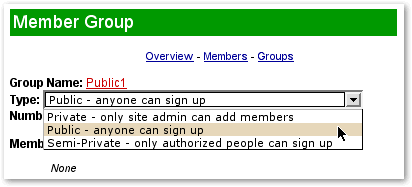
Finally, edit this group's member data fields and requirements.
For Semi-Private groups, you will need to specify what fields must match your predetermined identifying criteria. These are called confirmation fields.
Click on the Semi-Private group's name:
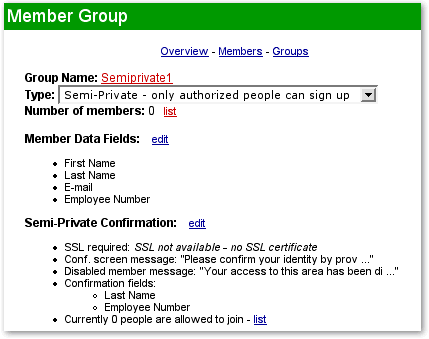
Edit the Confirmation settings to customize the user messages and specify the fields to be confirmed:
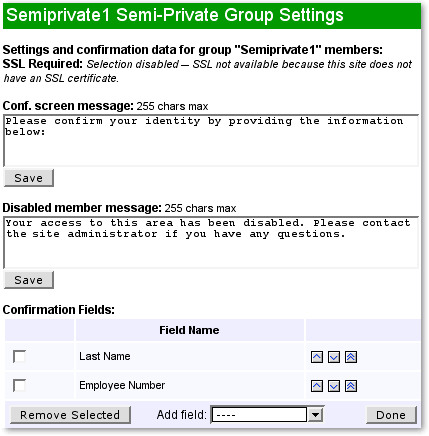
If you have not purchased an SSL certificate for your site, user connections will not be secure. However, if you specify a field to be encrypted, it will always be scrambled on our server; both the stored data and the user input will be encrypted, and compared to each other in that state.
To enter the list of confirmation data, return to the Member Group screen and click the "list" link:
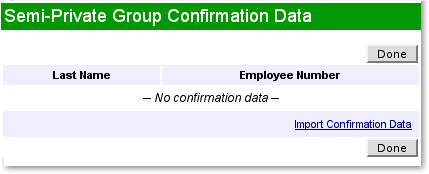
Click Import Confirmation Data. You will be able to type or paste a set of confirmation data for all people who are allowed to be members of this group.
Members
Click List Members to view all of the members; use the pop-up menu to see General (all groups) or any individual group:
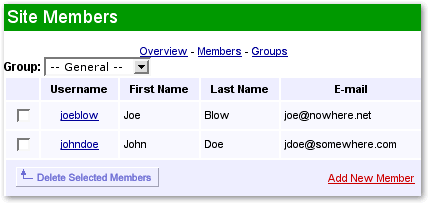
Click on a member to view or edit a member's details:
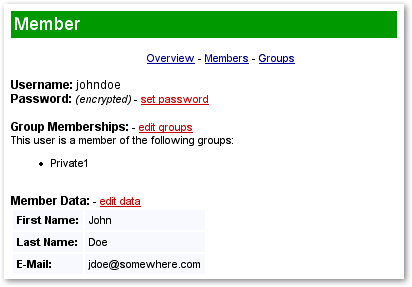
New public-group members may add themselves by registering on the website, or you can add them manually by clicking any Add Member link. Private-group members must be added manually:
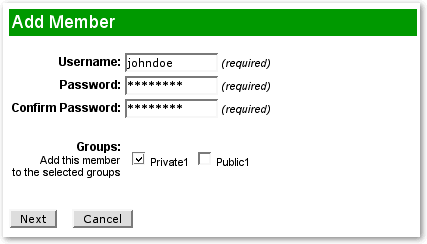
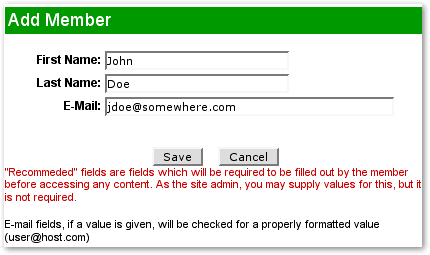
Assign a unique username and password, and check the groups to which this member will belong. NOTE: do not use space characters in usernames or passwords, only letters, numbers, hyphens, underscores, or periods. Next, click Next to complete the optional Recommended fields:
Feature Overview
Site Members are visitors who have access to a password-protected area of your website. When planning a protected Members Only area, first decide how access will be granted to visitors:
Private area
You, as the site administrator, create a list of approved members and issue them passwords.
Semi-Private area
Users may register themselves if they provide personal information that matches a list prepared by the site administrator.
Public area
An automated process in which users are registered after providing information about themselves. You determine what information must be furnished.
Users may be assigned to access groups, and separate members-only areas may be restricted to different groups.
Use the Site Members tools to manage members, groups, and member data.